


 VDJ Home
 Downloads
 License VDJ 9
 Support / How-To
 What's New?
Virtual DJ Studio 9
Once you have gotten the basics of Virtual DJ Studio, the next thing to familiarize yourself with should be the Player Line.Each Player Line can play Music, Video, and CDG Karaoke files.
Note: The Playlist Player looks very similar, and many of the functions here are the same. There is a separate page for the Playlist-Specific features, but it is recommended that you follow this section first, as most of the same features apply.
Below are the main features of the Player line, followed by a description of each:
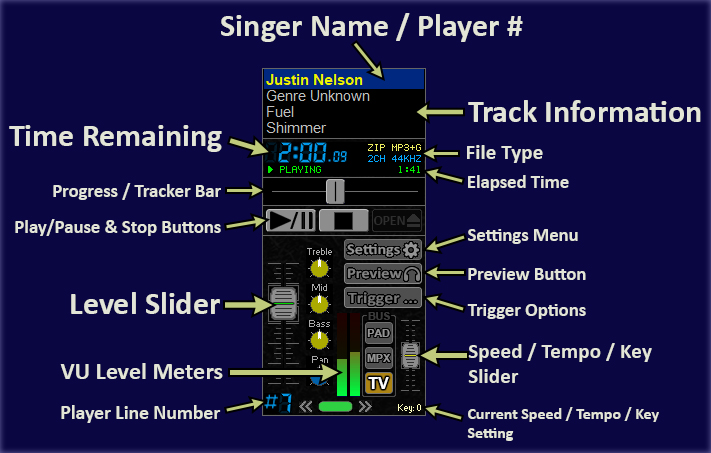
Main Components
We will first look at the main components shown above, and later on, we will get into the rest of the buttons and knobs.Singer Name / Player #

- OR -

Pressing F2 allows you to quickly edit the Singer Name. This name is what will display on the Video Screen (if configured to do so).
If a Non-Karaoke track is playing, this top line will simply display the Line # of the player -- however this is configurable (described later in Filename Display Options).
First we'll go down the LEFT side of the image above
Time Remaining
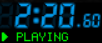
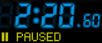
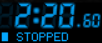
If the track is one hour or more, you will see the tiny dot become a colon, and the smaller digits represent Seconds, while the larger ones will then be Hours and Minutes.
As soon as the track becomes less than one hour of Remaining time, it will then flip to counting down from
59:59.99 for the rest of the
track's playback.
Directly under the Elapsed Time shows the current status: Playing, Paused or Stopped.
When the track reaches the end, it will turn Orange in color and you may see the remain time CHANGE, to represent the point at which it will Trigger the next track. More on that in the Trigger Settings.
Progress / Tracker Bar
 This shows the progress of the playing track. You can drag the center to any position
within the track.
The track pauses while you move the Tracker, and the Displayed Remain and Elapsed times update to show where you are within that track. In addition, for CDG tracks, the lyrics update instantly on the screen to reflect the position; for Video files, the still image updates approximately half a second after you stop moving the tracker.
You can also click to the left or right of the tracker to forward or back 5% of the track's length. Any time you release the tracker, the volume fades up slightly and quickly, to avoid abrupt sounds when seeking.
Play/Pause & Stop Buttons
 These are standard buttons to start, pause or unpause, or stop playback. Pausing keeps
the position, while Stopping resets to the beginning of the track.
Pro Tip: Hold CTRL while clicking Stop, and the track will fade out and stop over a few seconds.
The Open button is also available (when a track isn't playing) to manually hunt down a file, using the standard Windows Open dialog.
Level Slider
 This slider controls the level that this player mixes into the main bus. When you see the
"Cap" within the outline box, that represents "Unity Gain", or simply put,
100% volume. You can click and drag these sliders up and down, or scroll them with
your Mouse Wheel.
The range is -96db (all the way down, effectively silent) up to +12db (slightly more than twice as loud, as the human ear perceives it; 4x the actual amplitude).
Double-Clicking on the Cap resets it to the center, or "Unity" position.
VU Level Meters
 The VU meters display realtime level information. The very top represents 0db,
and anything above that would be considered Clipping (but see the section on AGC
for why this may not matter as much).
This is a helpful aide to show what is playing, and the relative volume level compared to other playing tracks.
Player Line Number
 This is mostly here to quickly identify a Player Line Number. If you have more than 9
Player Lines, the # symbol will be replaced with a 1 or a 2.
This indicator does serve an additional purpose: When a track has finished playing naturally, and enters a Disabled state, double-clicking this Line Number indicator is a quick way to restore the track to Open status.
Right-Side of the Image, Starting at the Top
Track Information
 This area shows things like the Genre, Artist, and Track Name. What shows
here depends on how you configure the Filename Display Options,
as well as whether or not the track contains an ID3 tag (MP3 Files)
or an MP4 Display Title.
File Type & Elapsed Time
 This area shows the File Type -- usually ZIP MP3+G, or MP3 Audio, MOV Video etc.
Under that is the audio properties - number of channels and the original sample rate.
Under that is the Elapsed Time in Green while playing, and the total track duration in light-grey when stopped.
Settings, Preview and Trigger Buttons
Click a Button for
its dedicated page:


The Settings button opens the Settings Menu, which deserves its own dedicated page.
its dedicated page:
The Preview Button, when clicked, routes this line's audio through your Preview Device, if configured. This button has many options, and therefore has its own page to describe its functionality.
Then there's a separate page for the Trigger Options button, which allows you to automatically Trigger another player line, a Playlist, or even an external application such as Spotify.
Speed / Tempo / Key Slider Control
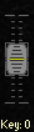 By default, Karaoke tracks will use this Slider to adjust the Key -- without changing
the speed -- of the Karaoke Track. You can go plus or minus 5 half-steps.
This is a handy feature for Karaoke, and singers often request that the key be dropped a step or two, so that they can hit higher notes.
For non-karaoke tracks, this defaults to being a Tempo control, which speeds up or slows down the track without affecting the pitch. Think of it as a Time Stretch/Shrink function.
Optionally you can set it to be a true Speed control, which simply gives the effect of speeding or slowing a tape or record.
Right-clicking the indicator at the bottom lets you select any of those three modes for any track type.
This slider is highly configurable, and thus has own dedicated page.